We’re excited to announce the release of a powerful new tool that can make your website smarter, more interactive, and more user-friendly. Meet the Needle QA Widget, a lightweight solution that brings AI-powered search directly to your site—with zero hassle.
Adding this feature is as simple as dropping a single line of code into your webpage. In fact… we use it ourselves every day :) Visit Needle Docs to try it out now. See how it works:
Whether you're a developer, a content creator, or someone who just wants to enhance their website's functionality, this widget is designed for ease of use and flexibility.
What does the widget do?
Let your users ask questions based on your website’s content and give them accurate, real-time responses. That’s exactly what this widget is designed to do. It’s built with Needle at its core, making delivering fast and relevant answers possible without the user leaving the page.
This is especially useful if you're managing:
Knowledge bases like FAQs where visitors need quick answers.
Blogs with a large archive of posts.
An e-commerce store with extensive product information.
How can I add it to my website?
All it takes is a few minutes. Here’s a sneak peek at how to get the Needle QA Widget up and running.
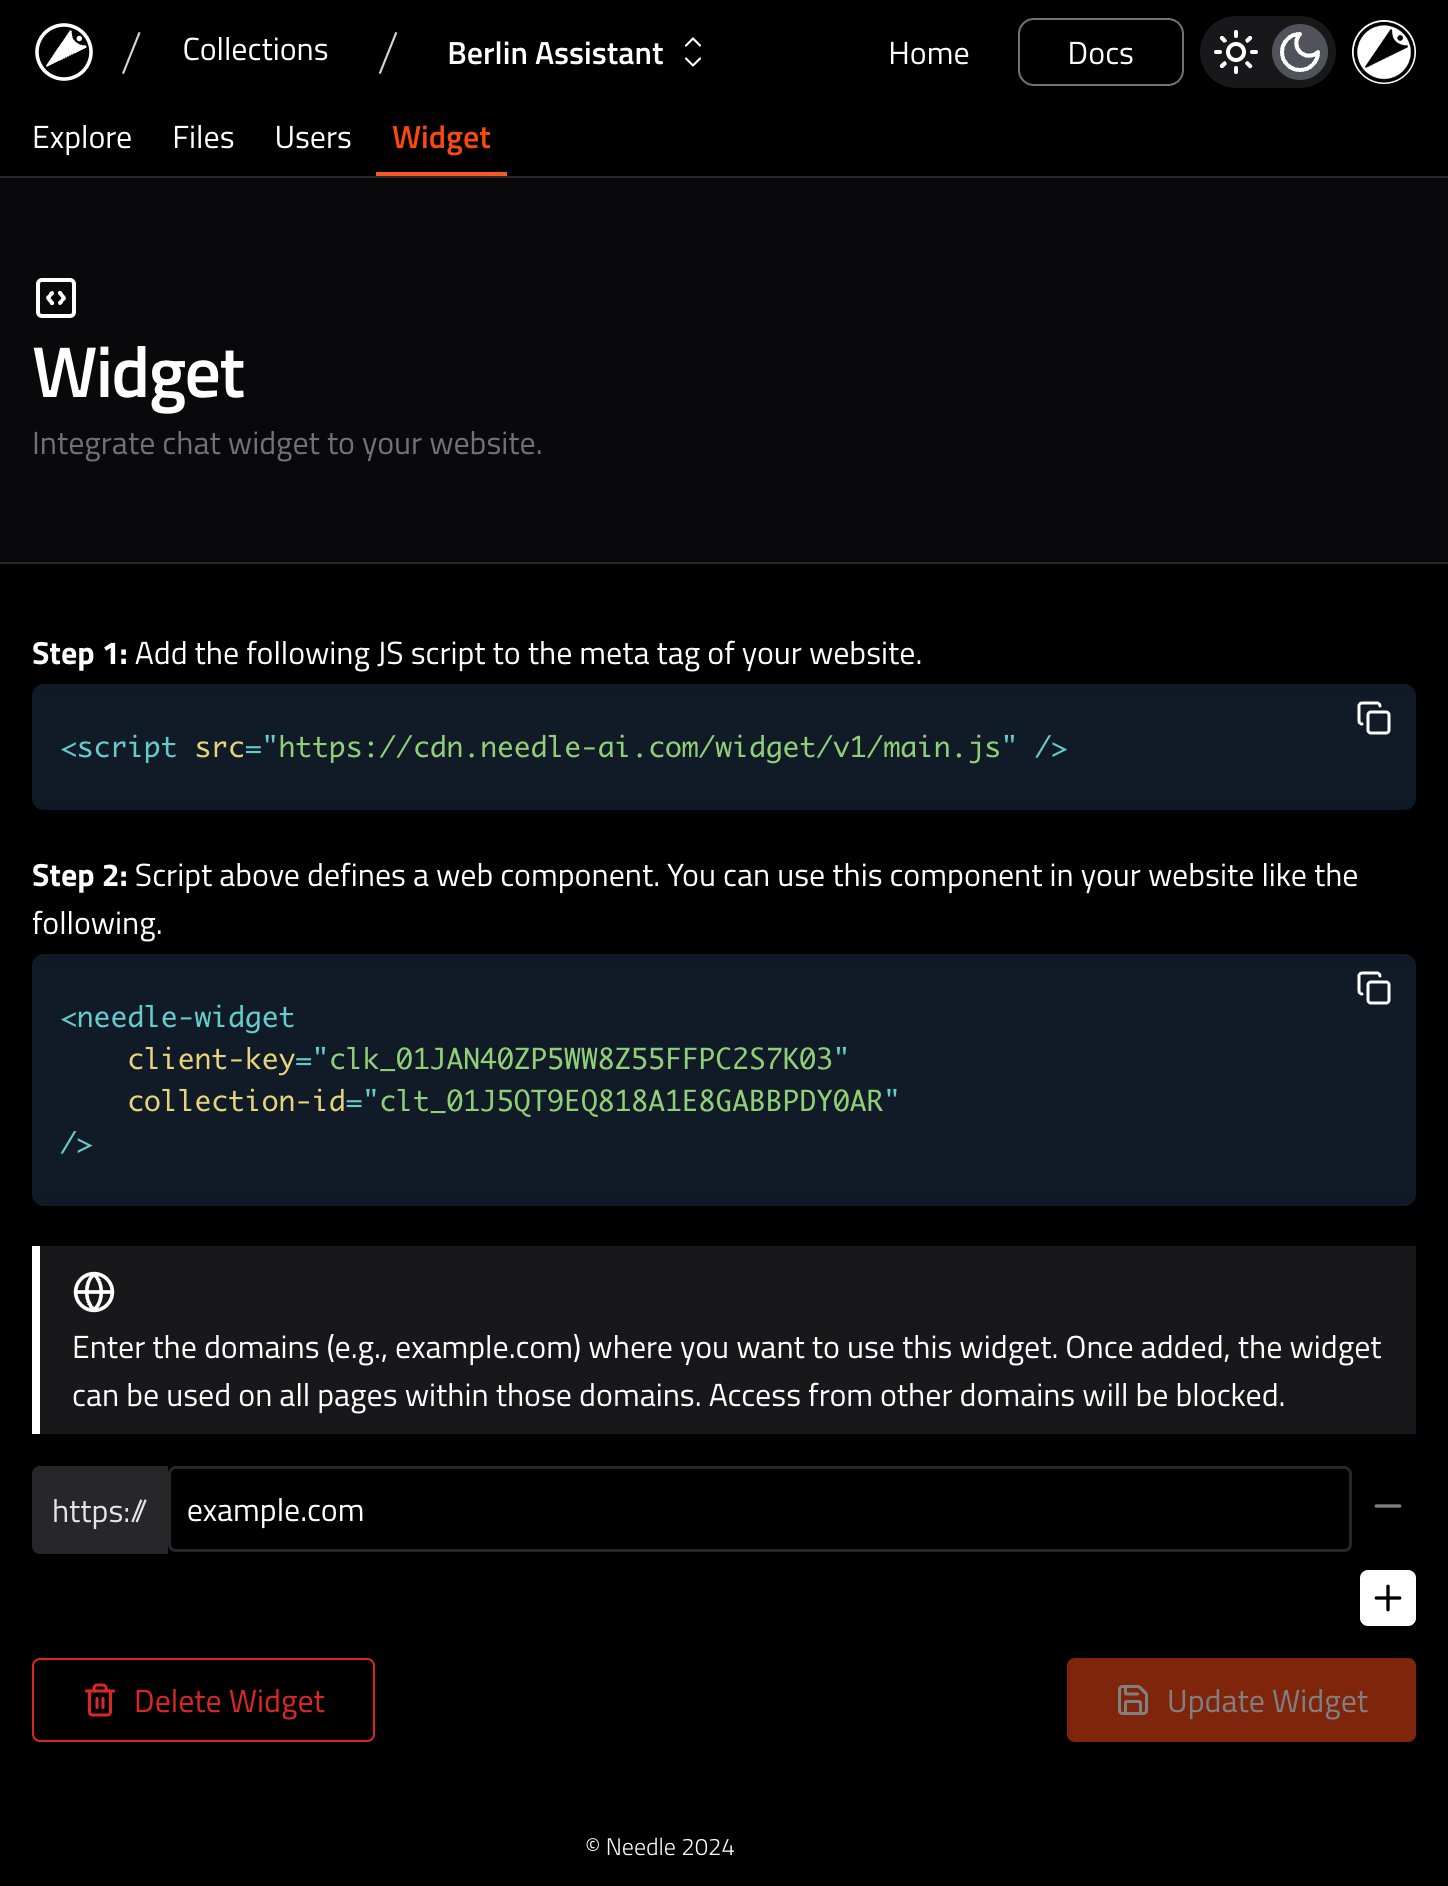
Step 1. Go to your Collection > Widget tab.
Step 2. Enter your website and click Create Widget. You will see a
<script>snippet and a web component<needle-widget>snippet. Copy both.Step 3. Add the script to the
<head>section and the web component to the<body>section of your website. Tada! 🎊
That’s it. No complex setup. No extra pages to manage. Just one widget doing all the heavy lifting on your behalf. Create your widget now and enhance your users experience at your website!
How It Works Behind the Scenes
We’ve designed the widget to be both powerful and seamless. It relies on NeedleClient, a tool that talks to your Needle backend to pull in the data your users are searching for. Here’s a brief look at the core functionality:
Search Query: When a user types a question, the widget sends it to Needle, which searches through your data to find relevant parts.
Response Generation: Based on the data, Needle generates a contextual answer and displays it in the widget.
User-Friendly Interface: Users interact through a simple floating button that opens the widget, allowing them to ask questions and get instant responses without any page reloads or additional clicks.
All of this happens in real time. Whether it’s answering simple FAQs or handling more complex requests, the widget is designed to be fast and responsive.
Why You Should Use It
Let’s talk about why this widget matters, whether you're running a small site or managing a growing digital property.
It Saves Time for Your Visitors: Your audience gets the answers they need, when they need them—no searching through endless pages or posts.
Boosts Engagement: By providing a dynamic, interactive element on your site, visitors are more likely to stick around and interact with your content.
Data-Driven Answers: The widget only provides responses based on the actual data you have, ensuring that the information is always accurate and relevant.
Super Simple Integration: Forget complex coding. All it takes is one line of script to make your site smarter and more user-friendly.
The Technical Details (For the Curious)
If you’re into the tech side, here’s a brief rundown of how the widget is constructed.
The widget itself is a React-based component, which uses Needle SDK libraries to interface with Needle’s powerful search engine. We export our code as Web Component, a powerful unifying standard supported by all major browsers to simplify integrating UI components into your website. It works whether your website is in React, Angular, Vue.js, Wordpress, Webflow, etc. you name it. Therefore Needle QA Widget has full compatibility.
We use @r2wc/react-to-web-component to convert our React code into Web Components standard. It works seamlessly off-the-shelf and we had very good experience using it! Kudos to the authors of the library 👏
One thing we had do differently when compared to developing a regular React app was packaging and delivery of the CSS styles. When developing a widget to be integrated in an external website, we must to isolate widget styles from the host website styles. For that purpose we used twind to allow using Tailwind in our widget code. Twind converts Tailwind classes into actual CSS rules at runtime with a minimal overhead.
See our packaging code below to get a gist of how we convert React components to Web Components.
import r2wc from "@r2wc/react-to-web-component";
import install from "@twind/with-web-components";
import config from "./twind.config";
import { AskQuestionWidget } from "./widgets/AskQuestionWidget";

const withTwind = install(config);

const AskQuestionWebComponent = withTwind(
  r2wc(AskQuestionWidget, {
    props: {
      collectionId: "string",
      clientKey: "string",
    },
    shadow: "open",
  }),
);

customElements.define("needle-widget", AskQuestionWebComponent);
Final remarks
As shown, getting started with Needle QA Widget is as simple as embedding the <needle-widget> tag into your site. We’re confident that will enhance your website’s functionality, making it easier for your audience to engage with your content and find the information they need.
If you wish a deeper integration for more functionality and customized UI experience, of course, you can check out our SDKs:
HTTP API: https://docs.needle-ai.com/docs/api-reference/needle-api
Typescript: coming soon… :)
Thanks for reading! Let us know how it works for you, and feel free to reach out with any questions! Find us in our Discord server. 👾
If you’re ready to take your website’s search experience to the next level, try out the Needle QA Widget today. It's the easiest way to add smart search to your site—without the headaches.


We are excited about the release of this new feature!